

Introduction
An example of allocating an additional memory for a system to use, by creating SWAP space.
Warning: Flash RAM cells used in SSDs drives have a limited lifespan. Using SWAP files on such devices can lead to issues with hardware degradation over time, faster wear of memory cells and critical hardware failures.
What is Swap?
Swap is an amount of hard drive storage used as operating system memory to temporarily store data that don't have enough room in available operative memory.
Step 1 – Prepare
Before start, need to check if there is enough disk space and if SWAP space is already in use. In most conditions one SWAP space file should be enough, it is possible to have multiple swap files or swap partitions in a system.
Check if the system have enough free disk space
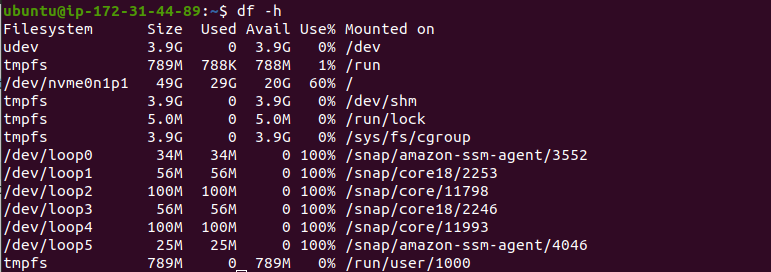
Check if SWAP space file is already created

Step 2 – Creating a Swap File
We will allocate a file of the size 1G, with the name "swapfile" in our root (/) directory. Using "fallocate" application. This command will create a file with defined size and in selected location. (File size and location can be adjusted to your needs)
ls -lh /swapfile
We will create a 1G file, after verify the creation and amount of space that was reserved.

Step 3 – Enabling the Swap File
Now when we have the file(/swapfile) with defined size, we need to turn this file into swap space file.
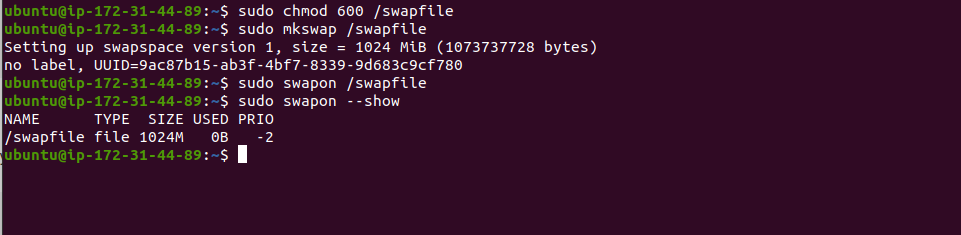
Important to set right permissions to prevent normal users from being able to access/edit the file, which will lead to security implications.
sudo mkswap /swapfile
sudo swapon /swapfile
sudo swapon --show
Enable swap space file and verify that the swap is available and has been set up successfully.
Step 4 - Configuration
Tuning your Swap Settings
Few options that can be helpful with default Swap configuration. Option to autoload Swap space file on system boot, settings to control swap system usage and effectiveness.
This command is required to be able to use our Swap space after system reboot. We can change this by adding a configuration line to /etc/fstab file.
The swappiness setting control how often your system swaps data out of RAM to the swap space. Possible values 0 and 100.
Close to 0 system will not swap data to the disk unless absolutely necessary.
Values closer to 100 will try to put more data into swap in an effort to keep more RAM space free.
This setting will control amount of cache inode and dentry information to store in Swap. This will help files system work faster.

Conclusion
This guide will give you a showcase of creating a swap file, activation and basic configuration on your Ubuntu 20.04 system, to protect against out-of-memory issues that can lead to execution errors or system freeze.
Bear in mind, that swap file is last stand option, and can lead to server performance decline as disk IO operations are significantly slower than ones kept in RAM, so the best solution is to optimize your applications or upgrade your server.